Chicco Cortina Instrukcja Użytkownika
Przeglądaj online lub pobierz Instrukcja Użytkownika dla Wózki dziecięce Chicco Cortina. manual de instruções carrinho cortina Instrukcja obsługi
- Strona / 36
- Spis treści
- BOOKMARKI


- Stroller 1
- MISE EN GARDE 4
- Parents Tray 6
- Plateau pour adulte 6
- Bandeja dos Pais 6
- To Open Stroller 7
- Ouverture de la poussette 7
- Abertura do carrinho 7
- To Adjust Handle 8
- Pour ajuster le guidon 8
- Ajuste da pega 8
- To Attach Basket Stand 9
- Tray Insert 11
- Intérieur du plateau 11
- Acessório da bandeja 11
- Front Wheels 12
- Les roues avant 12
- Rodas dianteiras 12
- Eixo traseiro 13
- Rear Axle 13
- L’essieu arrière 13
- Rear Wheels 14
- Les roues arrières 14
- To Attach Canopy 16
- Installation du baldaquin 16
- Instalação da capota 16
- To Secure Child 18
- Attacher l’enfant 18
- To Recline Seat 20
- Pour incliner le siège 20
- Reclined Carriage Position 22
- Posição reclinada da cadeira 22
- Swivel Wheels 24
- Les roues pivotantes 24
- To Fold Stroller 25
- Plier la poussette 25
- To Attach Infant Carrier 27
- Attacher le porte-bébé 27
- Cleaning and Maintenance 30
- Cuidados e Manutenção 31
- Entretien et nettoyage 32
- Artsana do Brasil Ltda 36
Podsumowanie treści
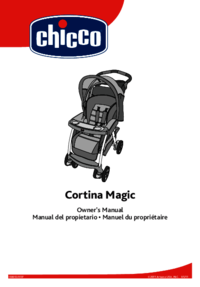
CortinaStrollerOwner's ManualManual del propietario • Manual de utilização InternationalIM9008.A.INT
10Child’s TrayLe plateau pour enfant Bandeja da criança WARNINGAlways secure your child with the seat belt. The tray is not a restraint device. Do not
11Tray InsertIntérieur du plateauAcessório da bandeja Snap tray insert into child's tray as shown.Remove tray insert by pulling up on one corner.
12Front WheelsLes roues avantRodas dianteiras Check that wheels are securely attached by pulling on wheel assemblies.Assurez-vous que les roues sont a
13Rear AxleL’essieu arrièreEixo traseiro13 CLIQUE! ENCLENCHEZ! RUIDO!Remove and discard plastic end caps on the rear axle.Enlevez et jetez les embou
14Rear WheelsLes roues arrièresRodasPlace wheel and washer on axle.Placez la roue et la rondelle sur l'essieu.Coloque a roda e a anilha no eixo.1
15Rear WheelsLes roues arrièresRodas16Snap hubcap over pin as shown. Repeat on other wheel.Enclenchez l'enjoliveur de roue sur la cheville tel qu
16To Attach CanopyInstallation du baldaquinInstalação da capota Slide canopy down frame over the connec-tors as shown.Faire glisser le baldaquin vers
17To Attach CanopyInstallation du baldaquinInstalação da capotaTo open canopy.Pour ouvrir le baldaquin.Abertura da capota19
18To Secure ChildAttacher l’enfant Retenção da criança 5 POINT HARNESSSqueeze buckle on both sides to release to undo
19To Recline SeatPour incliner le siègePara reclinar o assento WARNINGFabric caught in the latches may prevent them from locking. When returning seat
2WARNING• PLEASE SAVE OWNER’S MANUAL FOR FUTURE USE.• Adult assembly required.• Never leave child unattended. Always keep child in view while in stro
20To Recline SeatPour incliner le siège Apoio de pernas ajustável To recline: lift back of canopy, and squeeze recline hand
21Reclined Carriage PositionPoussette en position inclinéePosição reclinada da cadeira WARNINGChild may slip into leg openings and strangle. Never use
22Reclined Carriage PositionPoussette en position inclinéePosição reclinada da cadeiraLift leg rest, and thread straps through button holes on each si
23BrakesLes freinsTravões WARNINGCheck that brakes are on by trying to push stroller. AVISOVerifique se os travões estão funcionando, tentando empur
24Swivel WheelsLes roues pivotantes Rodas direcionáveis Front swivel wheels lock for use on uneven surfaces su
25To Fold StrollerPlier la poussette Fechamento do carrinho de passeio To fold , apply brakes, unfasten straps for reclined carri
26To Attach Infant CarrierAttacher le porte-bébéInstalação da cadeira de segurança auto WARNINGUse only Keyfit carrier with this travel system. Impro
27To Attach Infant CarrierAttacher le porte-bébéInstalação da cadeira de segurança autoThe KeyFit Carseat attachment points/anchors are located behind
28To Attach Infant CarrierAttacher le porte-bébéInstalação da cadeira de segurança autoRecline the stroller seat back to its lowest position. To attac
29To Attach Infant CarrierAttacher le porte-bébéInstalação da cadeira de segurança autoTO REMOVE INFANT CARRIER Squeeze release handle at back of infa
3AVISOO não cumprimento destes avisos e instruções de montagem pode resultar em lesões graves ou morte.• CONSERVE ESTE MANUAL DE INSTRUÇÕES PARA CONS
30Cleaning and Maintenance The cleaning and maintenance of this product must be carried out on a regular basis by the user.The cleaning and maintenan
31Cuidados e Manutenção O usuário deve realizar a limpeza e a manutenção deste produto regularmente. A limpeza e a manutenção devem ser feitas por um
32Entretien et nettoyage L’utilisateur doit effectuer le nettoyage et l’entretien de ce produit régulièrement. Le nettoyage et l’entretien de cette po
34NOTES
35NOTES
InternationalArtsana do Brasil Ltda.Rua Vigário Taques Bittencourt, 74Jd. Abrantes - Santo Amaro - SPcep. 04755-060 - fone (11) 2246-2100fax (11) 2246
4MISE EN GARDE• VEUILLER GARDER LE MANUEL D’UTILISATEUR POUR USAGE ULTÉRIEUR.• Assemblage par un adulte requis.• Ne laissez jamais votre enfant sans s
52X2X2X2X WARNINGCheck that you have all the parts for this model BEFORE assembling your product. If any parts are missing, call Customer Service. No
6The Parents tray contains the mechanism to unfold the stroller.Parents tray MUST be attached as shown in order to open the stroller. The tabs on both
7Once the tray is attached pull up on handle to open stroller.Une fois le plateau fixé, tirer sur la poignée pour ouvrir la poussette.Quando estiver mo
8To Adjust HandlePour ajuster le guidonAjuste da pega56 SNAP! ENCLENCHEZ! CLIQUE!
9To Attach Basket StandFixation du support de porte-bagagesFixação do cesto porta-objetosInsert stand into basket exactly as shown. Stand should slide
Więcej dokumentów dla Wózki dziecięce Chicco Cortina
Powiązane produkty i podręczniki dla Wózki dziecięce Chicco Cortina

 (24 strony)


 (68 strony)
 (24 strony)
 (2 strony)
© 2020, manymanuals.pl. Wszelkie prawa zastrzeżone. | 0.032 s |
 Manymanuals.com
 Manymanuals.de
 Manymanuals.fr
 Manymanuals.it
 Manymanuals.pl
 Manymanuals.cz
 Manymanuals.es
 Manymanuals-pt.com
Komentarze do niniejszej Instrukcji